- On the PackageX web dashboard go to the Settings section.
- Go to SSO/ Directory Integration.
- Select Google Workspace as the Directory Provider
.png?width=688&height=436&name=Untitled%20(14).png)
- Note down the Identifier (ENTITY ID) and the REPLY URL (ASSERTION
CONSUMER SERVICE URL). You will need these in the Google Workspace
Admin Portal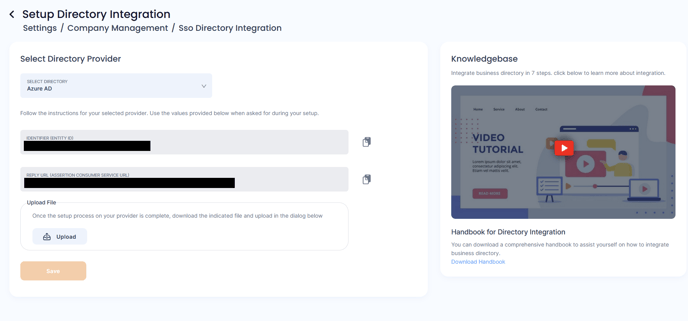
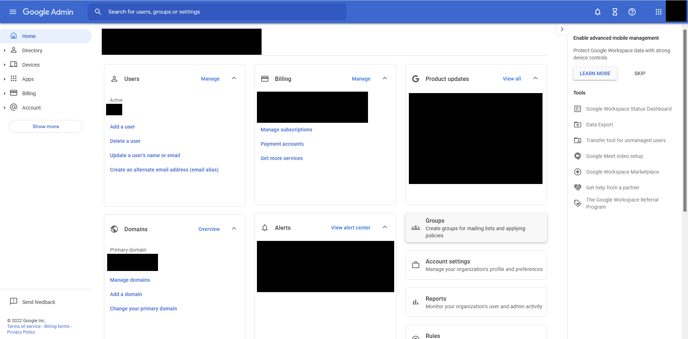
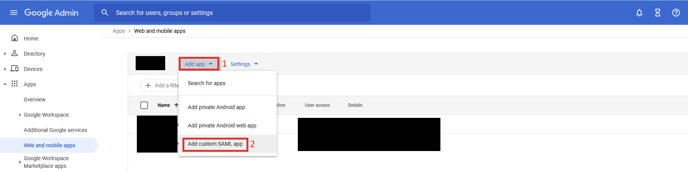
- Open https://admin.google.com and login with Admin Credentials
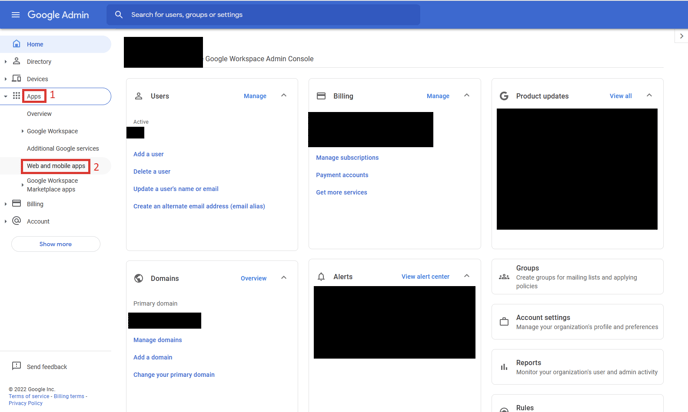
- Select Apps -> Web and mobile apps
- Click Add app -> Add custom SAML app
- Name your app e.g. PackageX Receive. Optionally upload a logo. Click
Continue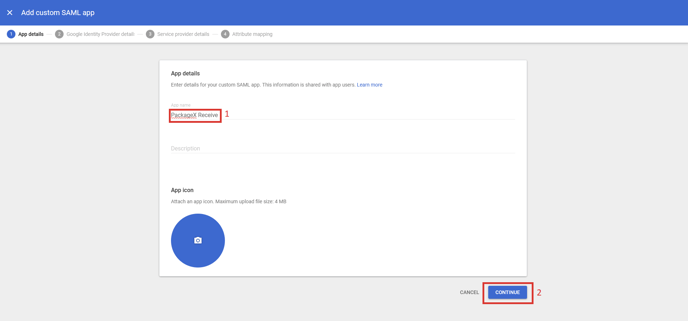
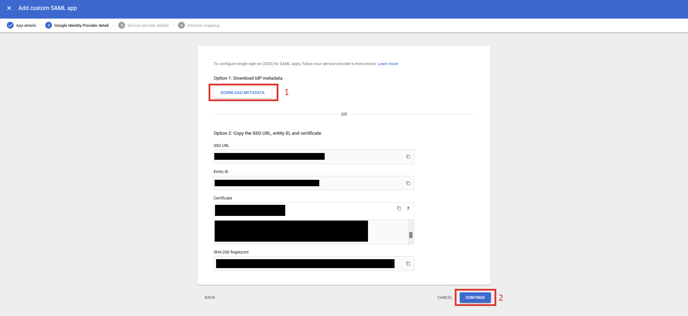
- Click DOWNLOAD METADATA and save the file. This will later be uploaded
in PackageX Receive Portal. Click Continue
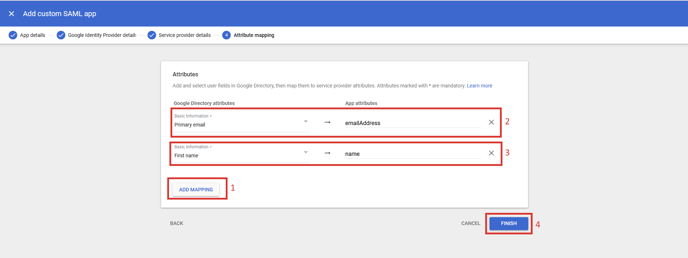
- Provide the ACS URL and Entity ID from step 2. You can directly copy these
values for the PackageX dashboard. Change the Name ID format to EMAIL.
Click Continue - Add the following two Attribute Mappings:
- Primary email -> emailAddress
- First name -> name
Click Finish
- Upload the “Metadata” file that you downloaded to the PackageX
Receive Dashboard and click Save.
After successful processing, SSO will be enabled.
You must allow access to the PackageX Receive app in Google Workspace
Admin Console. 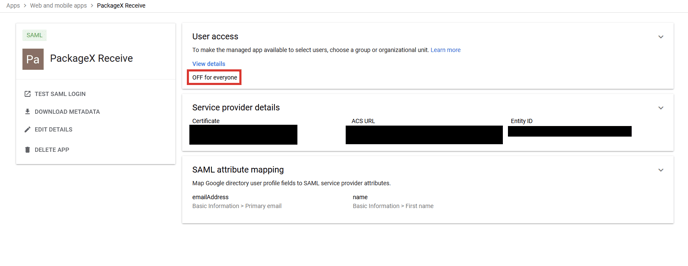
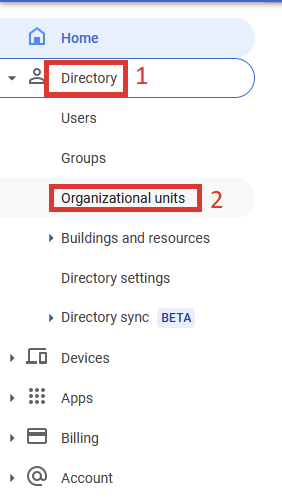
We recommend that you create an Organizational Unit in the Directory, add
users to that directory, and only allow the SAML app access to that
Organizational Unit.
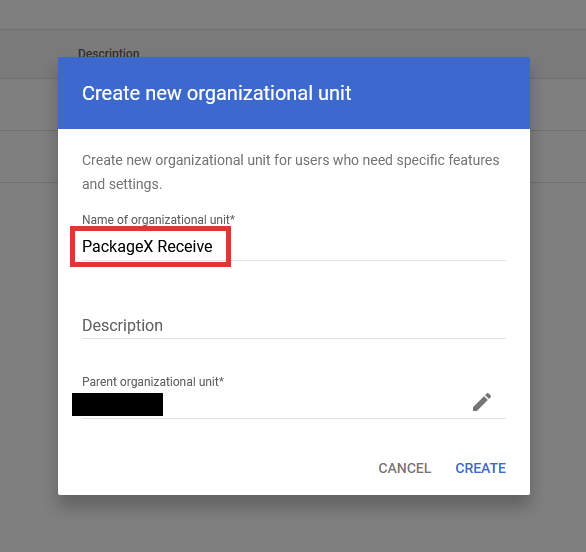
- You may name the organizational unit e.g. PackageX Receive and click Create
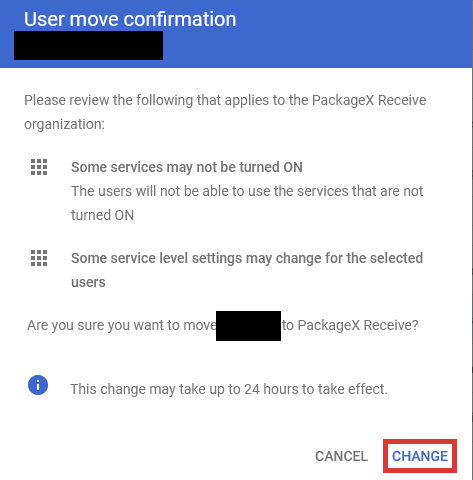
- Go to Directory -> Users. Select all users that you want to give SSO access to.
Then click More options and select Change organizational unit.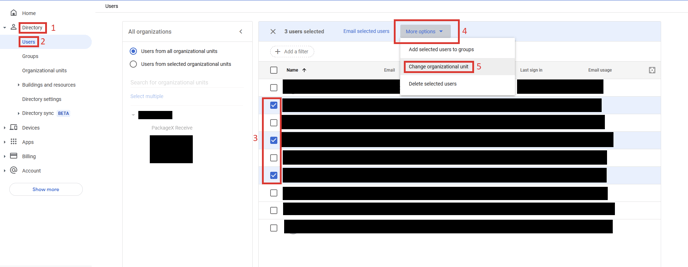
- Select the organizational unit e.g. PackageX Receive and click Continue. Click
Change in the next dialog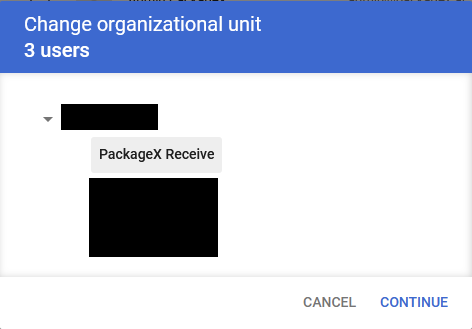
- Go back to Apps -> Web and mobile apps and click on the SAML app that
you created i.e. PackageX Receive

- Click on User access.
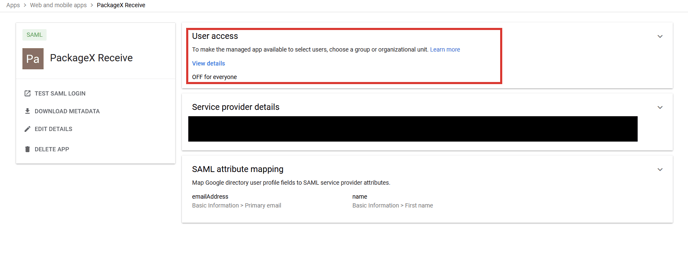
- Select the organizational unit of whose users you want to allow SSO access to
e.g. PackageX Receive. Click ON and then click OVERRIDE.
Now you may logout of the PackageX Receive Dashboard and log back in using
SSO.
Please be aware that Google may take some time for the settings to be
applied. In case there is a problem with the integration, the original PackageX Receive Admin of your organization will still be able to login with their username
and password.
This ends the SSO Integration phase
- If the information provided is correct, directory will be integrated and toggle will turn to ON.
- If the information provided is incorrect, you will be provided with an error message. E.g. you may be missing some required API permission, or the credentials and/or different Azure IDs added were invalid or mixed up.
SSO & Directory Management Tips
- You may choose to remove directory integration at any time by toggling it off
- To turn it back on again, you will need to re-enter the information required
- Removing SSO integration automatically removes the directory integration